Help
How can I organize my routes in folders or collections?
2019-08-08 14:56
Problem: you have a lot of routes and want to organise these in folders or collections.
Solution: TrailRunner mini has a simple feature you can use to group routes in collections. Just right-click (or select a route and choose open the action menu) to move the route to any of your collections.
Alternatively open the collections popover and drag one or multiple selected routes to any of your collections. Note that you can also tear-off the popover into a freestanding window by tearing the popover off at its top.
Background routes
2018-06-19 10:28
When you select a route in TrailRunner mini, the course is displayed in the map. But sometimes you may want to permanently display the route in the map, e.g. for planning alternatives or by making them visible as your path to follow when using RaceBunny while you are on your way biking or hiking.
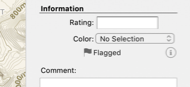
You either flag a route by selecting the flag in the right information area or by selecting the flag in the left list of routes:
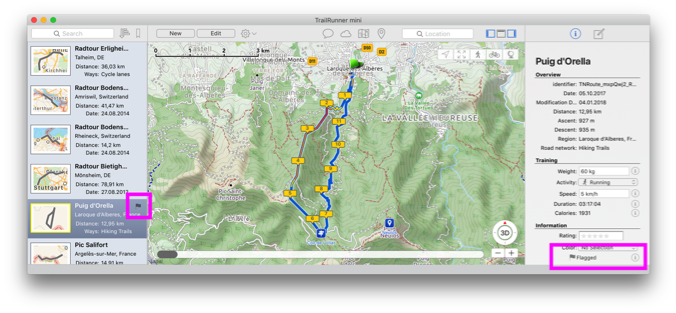
You either flag a route by selecting the flag in the right information area or by selecting the flag in the left list of routes:
Extended Route Notes
2018-01-22 16:47
With TrailRunner mini 3.6 and above, you can add additional notes and attachments to routes. These are multiple images, text fragments and links to websites or any file on your hard drive.
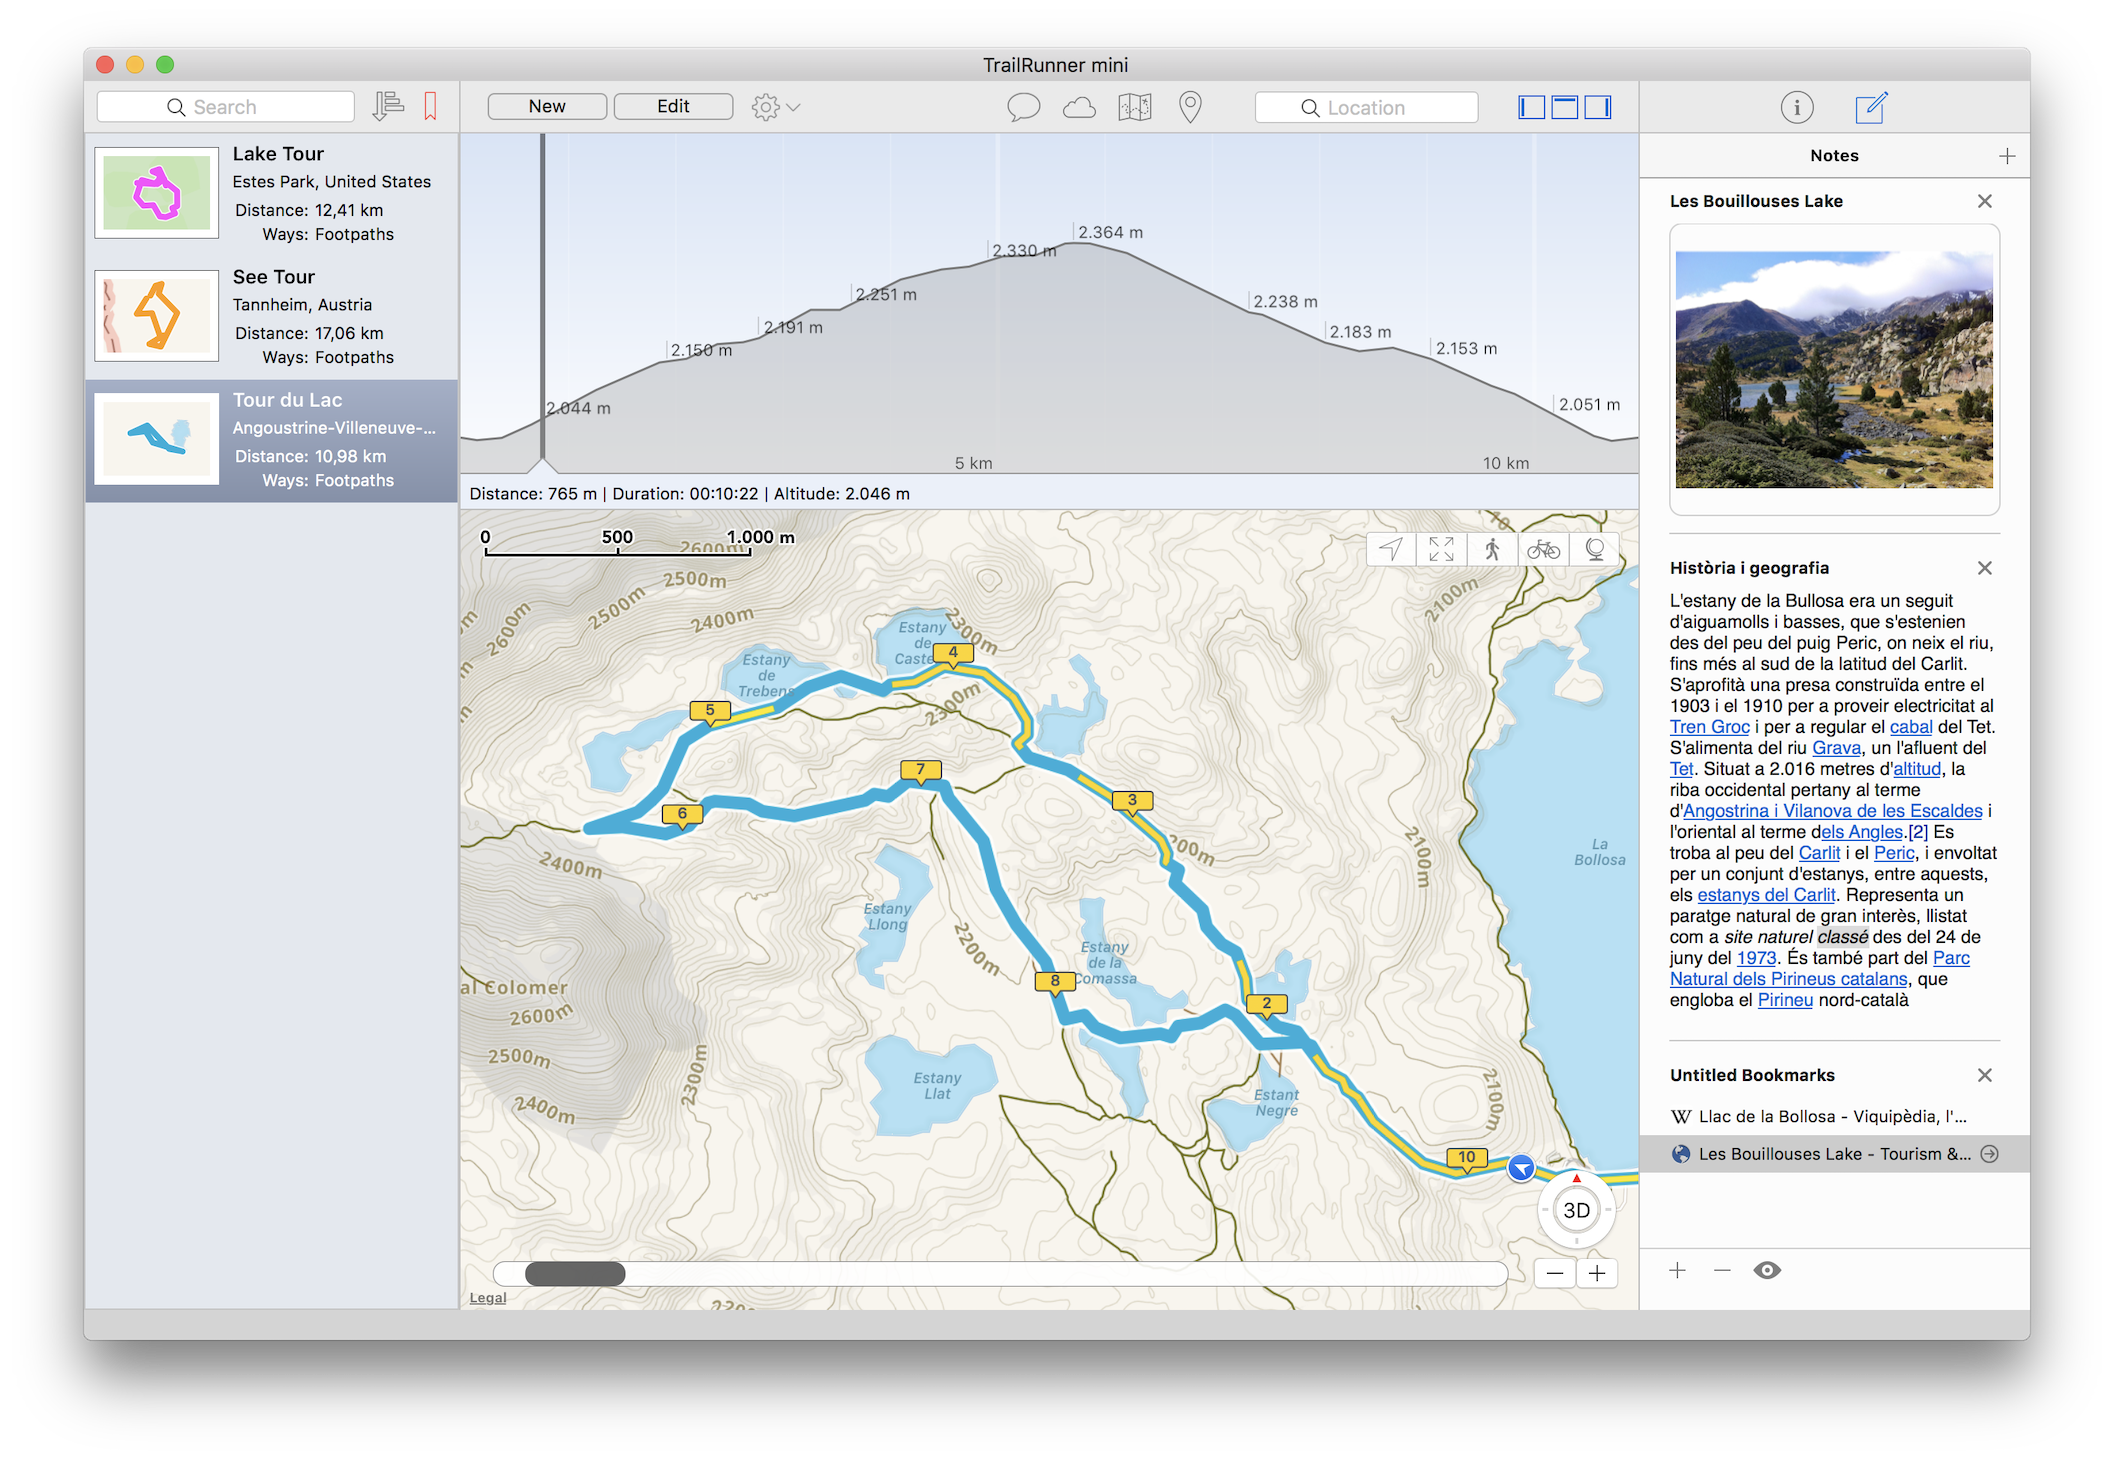
To use this feature, select a route. In the right info area select the notes icon. Then either drag anything into this area or add a container by clicking the top right + icon.
Once you have added multiple containers you may reorder them by clicking and holding within the background area of a container until the container starts hovering and then dragging the container to reorder it.
This feature is free to all users that have bought a subscription and for users that have bought a lifetime license for TrailRunner mini 3.6 and above. Users that have bought a license prior the 3.6 release have to buy a subscription.
How can I edit an imported route
2017-01-05 20:23
Problem: You have imported a course recording and want to edit the course.
Files imported in the format GPX, KML, TCX or FIT are typically recordings. These recordings are immutable in a way that they contain many recorded points with no logical connection to the OpenStreetMap network that underlies the TrailRunner mini routing editor.

So when you try to edit such a route, TrailRunner mini gives you the option to create a routable approximation of the route by guessing good transit locations that resemble the original as much as possible. You can even choose to display the original recording as a background route to compare and make corrections to the approximation.
 If you prefer to retrace the imported route from scratch you may also mark the imported route as flagged and start creating a new route. Flagged routes are always visible in the background. Then manually place and move your transit pins as needed.
Read more:
Files imported in the format GPX, KML, TCX or FIT are typically recordings. These recordings are immutable in a way that they contain many recorded points with no logical connection to the OpenStreetMap network that underlies the TrailRunner mini routing editor.
So when you try to edit such a route, TrailRunner mini gives you the option to create a routable approximation of the route by guessing good transit locations that resemble the original as much as possible. You can even choose to display the original recording as a background route to compare and make corrections to the approximation.
Read more:
Gradient overlay colors
2016-05-20 12:10
TrailRunner mini can display a color overlay that visually describes the gradient at a given route section. The color coding goes from yellow to red within the range of 5% gradient to 35% gradient.
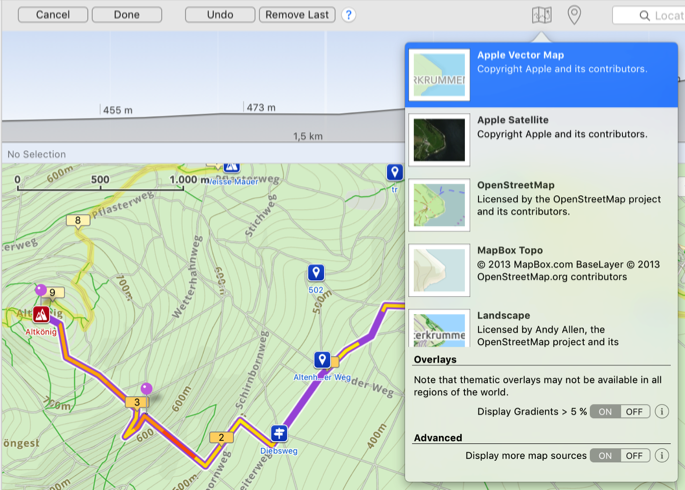
You can turn the gradient overlay on and off in the maps toolbar menu.
Please note that there are some technical limitations on the accuracy of the gradient because the underlying elevation data is not very accurate at all times. TrailRunner mini therefore calculates the gradient within smoothed intervals.
| 5% | 20% | 35% |
You can turn the gradient overlay on and off in the maps toolbar menu.
Please note that there are some technical limitations on the accuracy of the gradient because the underlying elevation data is not very accurate at all times. TrailRunner mini therefore calculates the gradient within smoothed intervals.
How can I stwitch between kilometer and mile display?
2016-01-12 12:02
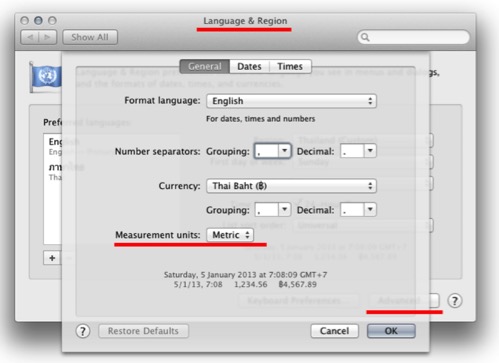
Problem: How can I set TrailRunner mini to display kilometers instead of miles?
Solution: Your Mac has a central setting for your measurement units:
You Mac > System Preferences > Language and Text > Advanced > General > Units : Metric
Solution: Your Mac has a central setting for your measurement units:
You Mac > System Preferences > Language and Text > Advanced > General > Units : Metric
How can I transfer routes to my iPhone?
2015-12-09 15:33
TrailRunner makes use of Apple iCloud to synchronize routes between all of your devices like iPhone, iPad and Mac.
Synchronizing routes with RaceBunny for iPhone

- Create a route in TrailRunner
- All your routes are automatically synchronized to iCloud
- Start RaceBunny on your iPhone
- Go to Menu > Planned Routes
Wait for the synchronization process to finish or again choose synchronize
- All your routes are now available in RaceBunny.
- Select a route and add it to the background routes
- Close settings
You now see your route as a background route in the map. Add more such routes if you like.
You can directly scroll the map to the beginning of the last flagged route by taping on the carrot icon.
Please also note that when you flag a route in TrailRunner it is — after the sync is through — automatically flagged in RaceBunny and therefore displayed as a background route. Same goes for colors assigned to routes in TrailRunner.
Troubleshooting
When you change or create a route in TrailRunner, it may take several minutes until the route appears in RaceBunny. So synchronize RaceBunny regularly to get the update. To conserve battery power and network traffic, RaceBunny does not automatically update routes and you always have to synchronize them manually.
How can I create off-road routes?
2012-11-21 16:40
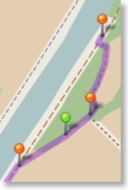
Solution: In the left editor panel, turn on the off-road switch. All now placed transit location pins are now green off-road pins that no longer follow the openStreetMap network. As an alternative, while moving or adding a transit-location, hold the (Command / ⌘) key down to place an off-road transit location. TrailRunner mini will then create a straight connection between the last transit location, the green off-road transit location and the upcoming transit location.
HowTo: Watch this video guide on how this works.
Contribute: To improve the mapping coverage of this area, you may want to contribute to the openstreetmap.org project. Layout the "missing link", export a GPX file and upload it to the openStreetMap network. It may then take up to two weeks until the track is available within TrailRunner mini. If that's not the case, remove the TrailRunner mini Cache from your hard-drive.
How can I print maps and routes?
2012-07-25 11:41
TrailRunner mini does not support printing of maps and routes. But you may help yourself by taking screenshots and then printing these.
To learn more, read Shortcuts for taking pictures of the screen.
Hint: You may also create a Keynote™ presentation and to paste the screenshots there. Within the keynote booklet you can add more details on your route like hotels, stops and phone numbers you may require during your trip.
To learn more, read Shortcuts for taking pictures of the screen.
Hint: You may also create a Keynote™ presentation and to paste the screenshots there. Within the keynote booklet you can add more details on your route like hotels, stops and phone numbers you may require during your trip.
How can I synchronize routes with my iPad?
2012-07-19 01:25
![]()
Both apps have almost identical features and can synchronize routes using iCloud.
How can I view my routes in GoogleEarth?
2011-06-08 09:02

Solution: Download and install the latest version of GoogleEarth. Then export the route and import the GPX file in GoogleEarth. It is now being displayed in the list of temporary locations on the left. Open the structure there and check only the track to be displayed.
Tip: In an upcoming release of TrailRunner mini the option 'View in GoogleEarth' will be available.
What does ascent and descent stand for?
2011-06-05 11:01
Problem: In the altitude histogram, TrailRunner mini displays two values derived from altitude values. These are named ascent and descent. What's the meaning of these?
Description: Ascent is the gain of only positive altitude differences. Descent is the opposite.
Example: With an altitude series of 10, 13, 15, 13, 11, 16 the
absolute elevation difference from the highest summit down to the lowest point would be 10..16 = 6
the ascent is 10..15 + 11..16 = 10
and the descent is 15..11 = 4
How can I move the aspect of the background map?
2011-05-09 13:37

Solution:
To move the aspect of the background map, click and hold until the hand cursor appears. Keep holding and move the mouse to change the aspect.
Tip:
To zoom into a location, double-click the location.
Use the key combinations ⌘+ and ⌘- to zoom in and out at the center of the background map.
On Multi-Touch capable input devices use the gestures to zoom and scroll in any direction.
Where can I find additional help?
2011-05-07 10:50
Problem: you have a question you cannot solve on your own my reading this FAQ. How can I contact you?
Solution: Within the application, use the Feedback menu item to open a mail message addressed to me.
One last thing…
You did not find answers to the questions you have? Or you have additional questions and remarks? Then please use the application feedback within TrailRunner mini to get in touch with me.
 Please note that I can only help you, if you contact me directly. Your feedback is valuable and must reach my brain, not the internet. Otherwise a bad review on the App Store will only lead to frustrations on my side that may stop further development of TrailRunner mini, which would be sad.
But if you are happy with TrailRunner mini and also like the support I give, I would highly appreciate your short review and some stars on the App Store.
Solution: Within the application, use the Feedback menu item to open a mail message addressed to me.
One last thing…
You did not find answers to the questions you have? Or you have additional questions and remarks? Then please use the application feedback within TrailRunner mini to get in touch with me.
But if you are happy with TrailRunner mini and also like the support I give, I would highly appreciate your short review and some stars on the App Store.